To effectively use concealer by concern, choose shades based on your skin’s undertone and specific issue—peach or salmon for bluish dark circles, yellow or peach for redness, and neutral tones for sallowness. Apply in small, targeted spots using tapping motions and blend seamlessly for a natural finish. Layer gradually, focusing on problem areas without overdoing it. Keep going to discover more tips that will help you perfect your color correction technique.
Key Takeaways
- Use peach or salmon concealers to neutralize blue or purple under-eye circles for targeted color correction.
- Apply yellow or peach shades to counteract redness or sallowness on the skin.
- Match concealer shades to your skin undertone for effective neutralization of specific concerns.
- Use precise application techniques, tapping with small brushes or fingers to avoid cakiness.
- Layer thin, well-blended concealer coats to achieve a natural, flawless finish while correcting discoloration.
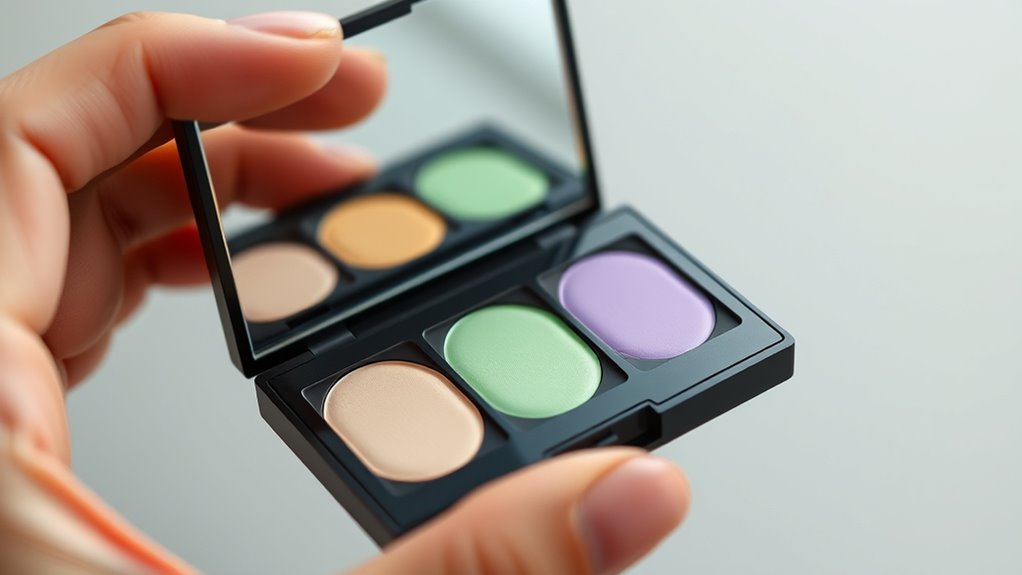
Color Correcting
Have you ever wondered how professional photos and videos achieve their flawless look? It all comes down to expert color correction, especially when it comes to concealer. When you’re tackling skin concerns, choosing the right shade and applying it correctly can make all the difference. The key is understanding shade selection—picking a concealer that neutralizes your specific concern—and mastering application techniques to blend seamlessly for a natural finish.
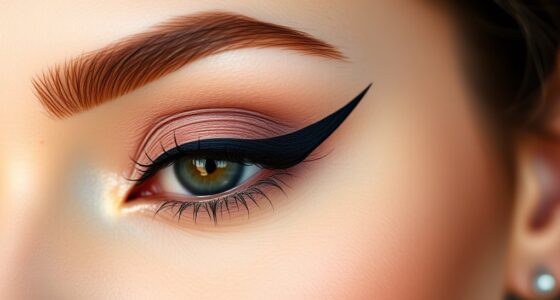
First, let’s talk about shade selection. Knowing your skin’s undertone is essential. If you have cool undertones, opt for concealers with a peach or salmon hue to counteract bluish or purple discoloration, such as under-eye circles or bruises. For warm undertones, yellow or peach shades work well to neutralize redness or sallowness. Neutral undertones can often handle a variety of shades, but the goal is always to find a color that cancels out the unwanted hue before applying your foundation. Choosing the wrong shade can highlight your problem areas instead of camouflaging them, so take the time to test shades on your skin before application. Remember, the goal is to find a concealer that acts as a color corrector, balancing out the discoloration rather than covering it outright. Additionally, understanding color correction techniques can help you achieve even more natural-looking results.
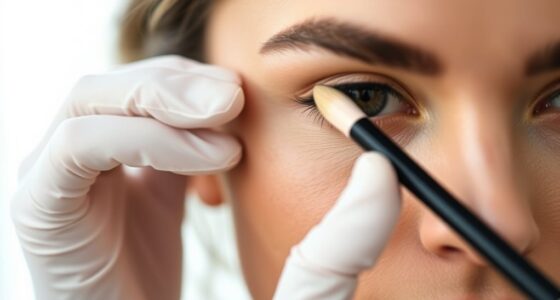
Once you’ve selected the appropriate shade, applying it with proper techniques guarantees a flawless finish. Use a small, precise brush or your fingertip to dab the concealer onto the targeted area—whether it’s dark circles, redness, or dullness. Light tapping or stippling motions help press the product into your skin for better coverage and blending. Be cautious not to swipe or rub excessively, as this can cause the product to move or appear cakey. Blend the edges gently into your surrounding skin, gradually building coverage without creating harsh lines. If you’re correcting multiple concerns, layer your concealers in thin coats, allowing each layer to set before adding the next. This layered approach prevents creasing and maintains a natural look.
Frequently Asked Questions
How Do I Choose the Right Color Corrector for My Skin Tone?
To select the right color corrector for your skin tone, start with shade matching to find a hue that neutralizes your specific concern. Identify your undertone—cool, warm, or neutral—as this guides your corrector choice. If you have redness, opt for a green corrector; for dullness, try peach or orange. Test shades near your skin tone to ensure seamless blending, and always consider your undertone for the best match.
Can Concealers Be Used Alone Without Color Correcting?
Think of concealers as versatile brushes in your makeup kit; they can stand alone for quick, natural coverage or work with color correctors for a flawless finish. Yes, you can use concealers alone without color correcting, especially if your skin is clear or only needs a subtle touch-up. Their natural coverage brightens and evens out your skin tone, making you look fresh-faced and confident without extra steps.
How Long Does Color-Corrected Makeup Typically Last?
Color-corrected makeup typically lasts around 4 to 8 hours, depending on your skin type and product quality. To maximize color longevity, use a good primer and set your makeup with a translucent powder. For touch-up tips, carry a small amount of setting spray or powder to refresh your look throughout the day. Proper application and sealing can help your color correction stay fresh longer.
Are There Any Skin Types That Shouldn’t Use Color Correctors?
If you have sensitive or acne-prone skin, you should be cautious with color correctors. They may irritate sensitive skin or clog pores, leading to breakouts. Always choose formulations labeled for sensitive skin, and do a patch test first. Look for non-comedogenic and fragrance-free options to minimize irritation. If your skin reacts negatively, it’s best to avoid color correctors or consult a dermatologist for tailored advice.
What’s the Best Way to Apply and Blend Color Correctors?
You should start by applying a small amount of color corrector with your fingertips or a brush, then use layering techniques to build coverage. Blend it seamlessly with your favorite blending tools, like a damp sponge or brush, focusing on the edges to avoid harsh lines. Pat gently until the correction melds into your skin, creating a smooth, even base for your foundation. This method ensures natural, flawless results.
Conclusion
Now that you understand color correcting, think of it as your makeup’s secret weapon—like a master key revealing every flaw. When you choose the right concealer for your concern, you’re painting a clearer, more confident version of yourself. Remember, with a little color correction, you’re not just covering imperfections; you’re transforming them into a canvas of perfection. Embrace the power of your brush, and let your natural beauty shine through effortlessly.