To seal leaks and cut bills, focus on identifying drafts around doors and windows by feeling for cool air or using a candle. Use the right weatherstripping materials, like foam tape or door sweeps, and make certain surfaces are clean before application. Proper installation and regular checks help maintain an efficient seal. Upgrading to more durable materials over time can boost energy savings and comfort. Keep exploring for smart tricks to make your home even more energy-efficient.
Key Takeaways
- Identify and seal all gaps around doors and windows using appropriate weatherstripping materials like foam tape or V-strip.
- Measure gaps accurately to choose the right weatherstripping size and ensure a tight, effective seal.
- Install weatherstripping during mild weather for better adhesion and easier application.
- Regularly inspect and replace worn or damaged weatherstripping to maintain energy efficiency and prevent leaks.
- Consider upgrading to durable materials like silicone or rubber for long-lasting seals and improved savings.

Weatherstripping is one of the simplest and most effective ways to improve your home’s energy efficiency. When done correctly, it seals gaps around doors and windows, preventing drafts that cause your heating and cooling systems to work harder. This not only keeps your home more comfortable but also reduces your energy bills over time. The key is identifying where leaks occur and choosing the right weatherstripping material for each spot.
Sealing gaps with weatherstripping boosts home comfort and saves energy efficiently.
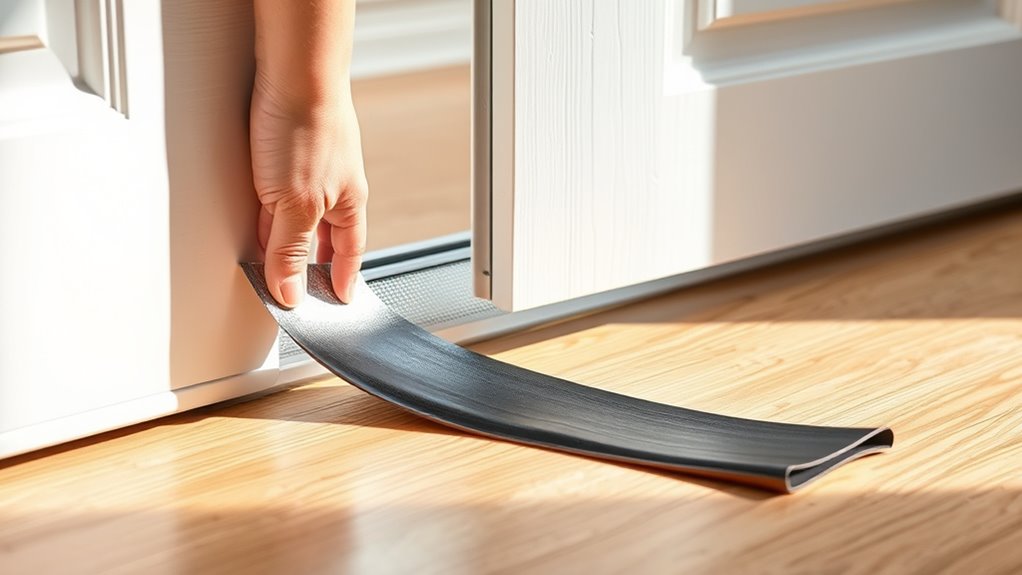
Start by inspecting all your doors and windows. Feel for drafts by holding your hand near the edges or use a lit candle to see if the flame flickers when placed close to potential leaks. Once you locate the gaps, select the appropriate weatherstripping. For larger gaps around exterior doors, consider using foam tape or door sweeps. Foam tape is easy to apply and provides a good seal against drafts, while door sweeps help close the gap at the bottom of the door, preventing cold air from sneaking in. For windows, thin adhesive-backed foam or V-strip weatherstripping works well, offering flexibility and a snug fit.
When applying weatherstripping, make sure the surface is clean and dry. Remove any old material, dirt, or grease to ensure proper adhesion. Carefully measure the length of the gaps to avoid excess material that could interfere with door or window operation. For foam tape, peel off the backing and press firmly along the edges. For V-strip or door sweeps, follow the manufacturer’s instructions for fastening, often using nails or screws. Take your time to ensure a tight seal; a poorly installed strip won’t be as effective.
Timing also matters—install weatherstripping during mild weather, so you’re not working in extreme cold or heat. Proper installation can last for years, but periodically check for wear or damage, especially after harsh weather. Replace worn or damaged strips promptly to maintain your home’s energy efficiency. Keep in mind that weatherstripping isn’t a one-time fix; regular maintenance keeps your home comfortable and your bills lower.
In addition to sealing gaps, consider upgrading older weatherstripping if it’s lost its elasticity or adhesion. Modern materials like silicone or rubber provide better durability and flexibility. Remember, sealing leaks isn’t just about comfort; it’s a smart way to cut down on energy waste and save money. With a little effort, you can greatly improve your home’s efficiency and enjoy a cozier environment all year round. Regular inspection and using durable weatherstripping materials can further enhance your home’s energy savings over time.
Frequently Asked Questions
How Often Should I Replace Weatherstripping for Optimal Efficiency?
You should replace your weatherstripping every 5 to 10 years to maintain peak efficiency. Keep an eye out for cracks, tears, or gaps, as these signs indicate it’s time for a new seal. Regularly inspecting your weatherstripping helps catch issues early, saving you money on energy bills. If you notice drafts or increased heating and cooling costs, it’s a good idea to replace the weatherstripping promptly for better insulation.
Can Weatherstripping Be Reused or Recycled?
Can weatherstripping be reused or recycled? Think of it like a worn-out shoe; some parts can be reused or recycled, but not all. You can often salvage and reuse certain types like foam tape if they’re still sticky and intact. Recycling options depend on your local facilities, so check with them. Reusing weatherstripping saves money and helps the environment, making it a smart choice whenever possible.
Is Weatherstripping Effective for All Types of Doors and Windows?
Weatherstripping is effective for most types of doors and windows, but its efficiency varies depending on the material and installation. For example, foam and rubber work well on standard doors, while V-strip or felt might suit older or irregular windows better. You should choose the right type for your specific door or window, guarantee a proper seal, and replace worn or damaged strips regularly to maximize energy savings and comfort.
What Are the Signs That My Weatherstripping Is Failing?
You’ll notice drafts around your doors or windows when the weatherstripping starts to fail. Increased energy bills are a clear sign, indicating that your home isn’t well insulated anymore. You might also feel cold spots or see moisture buildup and mold growth, which suggest leaks. If the weatherstripping looks cracked, brittle, or gaps are visible, it’s time to replace it to keep your home energy-efficient and comfortable.
Are There Eco-Friendly or Non-Toxic Weatherstripping Options Available?
Yes, you can find eco-friendly and non-toxic weatherstripping options. Look for products made from natural materials like wool, felt, or cork, which are biodegradable and non-toxic. Silicone or rubber weatherstripping labeled as environmentally friendly also exists. These options help you seal leaks effectively while reducing chemical exposure and environmental impact. Always check labels and product descriptions to verify they meet eco-friendly standards before purchasing.
Conclusion
Now that you’ve learned these weatherstripping tricks, you’re like a master locksmith sealing every tiny leak. Think of your home as a fortress, and these simple steps as the secret keys to keep drafts out and bills down. With your newfound skills, you’ll create a cozy, energy-efficient haven that stands strong against the elements. So go ahead—lock out the cold and enjoy the warmth, knowing you’ve got the perfect tools to keep your home sealed tight.


