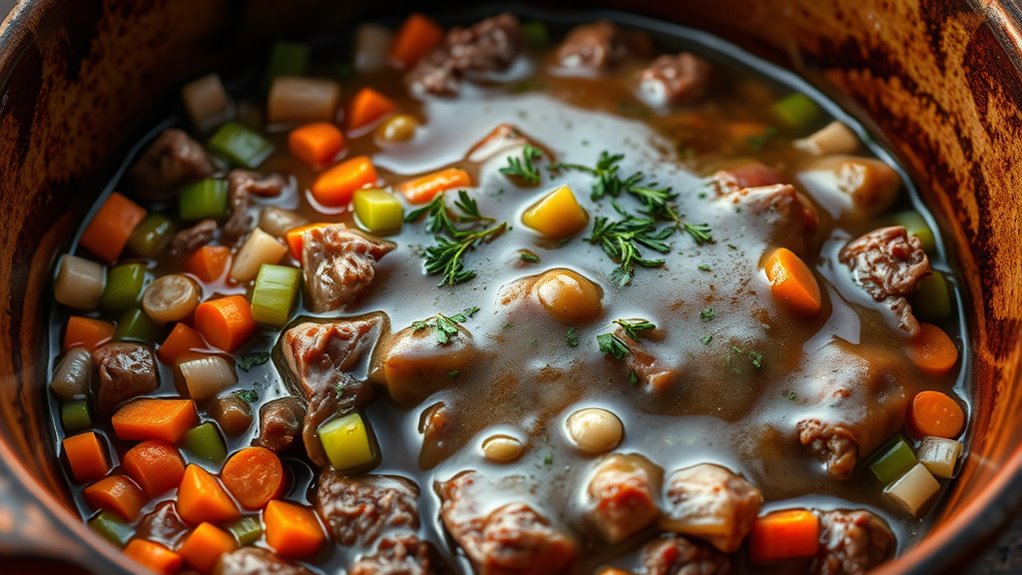
The secret to making one-pot meals taste restaurant-quality with your Dutch oven is mastering how it retains and distributes heat. Use a heavy, well-fitting lid to trap moisture, layer ingredients strategically from hearty to delicate for even flavors, and control your temperature carefully for perfect searing and braising. Consistent heat and proper timing release rich flavors and tender textures. Keep going, and you’ll discover even more tips to elevate your cooking results.
Key Takeaways
- Proper heat retention and even distribution prevent hot spots, ensuring uniformly cooked, restaurant-quality flavors.
- Preheating the Dutch oven and maintaining consistent, controlled temperatures promote optimal browning and Maillard reactions.
- Layering ingredients strategically allows flavors to meld naturally and enhances overall dish depth.
- Trapping moisture with a tight-fitting lid creates a high-humidity environment, resulting in tender, flavorful meals.
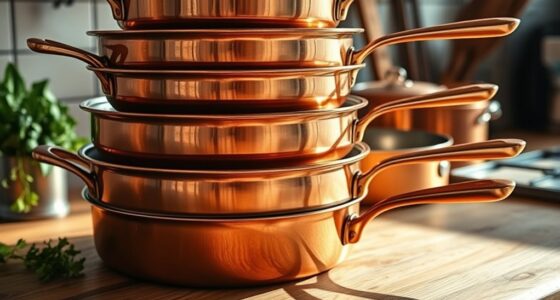
- Using high-quality, well-seasoned or enameled cast iron enhances heat retention and flavor development for professional results.

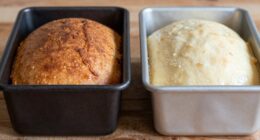
Enameled Cast Iron Dutch Oven – Umite Chef 5QT Pot with Lid & Cotton Potholders – Heavy-Duty Cookware for Bread Baking, Braising, Stews, Roasting(Cream White)
Even Heat Distribution Retention: This Umite Chef Dutch oven Made with heavy-duty enameled cast iron, ensures even heat…
As an affiliate, we earn on qualifying purchases.
As an affiliate, we earn on qualifying purchases.
The Science Behind Dutch Oven Heat Retention

Dutch ovens are renowned for their exceptional heat retention, which stems from their thick, dense construction. This material absorbs and holds heat evenly, preventing hot spots and ensuring consistent cooking. When you heat a Dutch oven, the heat penetrates deeply into the walls and base, creating a thermal mass that continues to radiate warmth even after you remove it from the heat source. This slow and steady release of heat allows flavors to meld and ingredients to cook uniformly. The lid plays a pivotal role by trapping moisture and heat inside, maintaining high humidity levels. As a result, your dishes become tender and flavorful, with minimal temperature fluctuations. This scientific design makes Dutch ovens ideal for slow-cooking, braising, and baking. Additionally, the heat retention properties reduce the need for constant supervision, making it easier to achieve perfect results with less effort.

Overmont Enameled Cast Iron Dutch Oven – 7QT Pot with Lid Cookbook & Cotton Potholders – Heavy-Duty Cookware for Braising, Stews, Roasting, Sourdough Baking Cream White
Outstanding Heat Mastery: Crafted with precision, Overmont premium enamel cast iron ensures exceptional heat distribution and retention. Its…
As an affiliate, we earn on qualifying purchases.
As an affiliate, we earn on qualifying purchases.
Choosing the Right Dutch Oven for Perfect Results

Selecting the right Dutch oven can make all the difference in achieving perfect cooking results. You want a piece that heats evenly, retains heat well, and is durable enough for daily use. When choosing, consider these key factors:
Choosing the right Dutch oven ensures even heating, durability, and perfect daily cooking results.
- Material: Enameled cast iron offers easy cleanup and versatility, while bare cast iron is excellent for high-heat searing.
- Size: Pick a size that suits your typical recipes, usually between 5 to 7 quarts for family meals.
- Lid Fit: A tight-fitting lid traps moisture, essential for tender, flavorful dishes.
- Handle Comfort: Ensure handles are sturdy and comfortable for easy lifting, especially when hot.
- Rustic charm can enhance the aesthetic of a farmhouse kitchen, making your Dutch oven not just functional but also a decorative piece.
- Additionally, understanding store hours of nearby retailers like Ulta Beauty or Sally Beauty Supply can help you plan your shopping trips effectively, ensuring you find the perfect Dutch oven at the right time.
- To further optimize your cooking, consider the material and construction, as these impact heat distribution and durability over time. Proper maintenance, including seasoning and cleaning techniques, can extend the lifespan of your Dutch oven, ensuring consistent results.
- Taking the time to research product reviews can help you select a Dutch oven that balances quality and price, making your investment worthwhile.

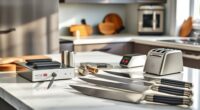
12 Inch Tempered Glass Lid for Lodge 12" Cast Iron Skillets & 7QT Dutch Ovens -Stainless Steel Handle and Rim (12 INCH LID)
12 INCH LID-You will receive an 12inch glass replacement lid with an inner diameter of 29.4cm/11.57in and an…
As an affiliate, we earn on qualifying purchases.
As an affiliate, we earn on qualifying purchases.
Mastering the Art of Searing and Browning

Getting perfect caramelization starts with using high heat and patience to build flavor. Make sure your Dutch oven is hot enough before adding ingredients, so browning happens evenly. With practice, you’ll master searing and browning to enhance every dish.
Achieve Perfect Caramelization
Achieving perfect caramelization begins with understanding the importance of high heat and dry, even surface contact. When your Dutch oven is hot enough, it encourages natural sugars and proteins to develop that rich, golden-brown crust. To guarantee even browning:
- Pat your ingredients dry to remove excess moisture.
- Preheat your Dutch oven thoroughly before adding food.
- Avoid overcrowding the pan, which can cause steaming instead of searing.
- Use a high-smoke-point oil to promote quick, even browning.
- Ensuring proper temperature control helps maintain consistent heat for optimal caramelization.
- Additionally, understanding the role of AI in food innovation can inspire new techniques for achieving the perfect sear.
Use High Heat Properly
Mastering high heat is key to creating a beautifully seared crust and rich browning in your dishes. Start by preheating your Dutch oven over medium-high heat until it’s hot but not smoking. Add a small amount of oil with a high smoke point, like vegetable or canola oil, and let it heat until shimmering. Carefully place your meat or vegetables in the pot, making sure not to overcrowd, which can lower the temperature. Resist the urge to move or flip too soon; give it time to develop a crust. Proper high heat creates Maillard reactions, enhancing flavor and texture. Once browned, you can lower the heat to build layers of flavor without burning. Using high heat correctly guarantees bold, restaurant-quality searing every time.
Patience for Better Browning
Patience is essential when browning meat or vegetables in your Dutch oven, as rushing the process often results in uneven searing and lost flavor. When you give it time, the surface caramelizes properly, creating rich, complex flavors. To master this, verify your ingredients are dry before adding them to the hot pot—moisture hampers browning. Don’t overcrowd the pan; too much at once lowers the temperature and prevents proper searing. Let the meat sit undisturbed until it develops a deep, golden crust before flipping. Remember, browning is a gradual process that builds depth in your dish. Consistent messaging also involves maintaining consistent heat and avoiding rapid temperature fluctuations to ensure even searing and flavor development. Emphasizing patience aligns with the existential themes of authenticity and deliberate action, reinforcing that good results often require time and mindful effort. Additionally, understanding how engine tuning can improve engine response reminds us that precision and patience lead to optimal performance—whether in cooking or vehicle modification.

Nuovva Enamelled Cast Iron Dutch Oven Pot with Lid – 6.4 Quart Non Stick Casserole Pot – Heavy Duty & Oven Safe up to 500° F for Bread Baking, Braising, Stews, Roasting – 28cm Dark Blue
LOW MAINTENANCE: a great alternative to the traditional bare cast iron pot for busy working individuals, our ovenproof…
As an affiliate, we earn on qualifying purchases.
As an affiliate, we earn on qualifying purchases.
The Importance of Proper Layering and Ingredient Order
You’ll find that layering ingredients correctly enhances flavor and guarantees even cooking. Placing heavier items at the bottom and delicate ingredients on top helps everything meld perfectly. Paying attention to the order makes a big difference in the final taste and texture of your dish. Using diverse container designs can also influence heat distribution and overall cooking performance. Incorporating on-device AI capabilities into your cooking equipment can further optimize heat management and recipe adjustments.
Layering for Flavor
Proper layering of ingredients is essential for revealing maximum flavor in your Dutch oven dishes. When you layer correctly, each component cooks in its ideal environment, allowing flavors to meld beautifully. Start by placing hearty ingredients like root vegetables and meats at the bottom, where they get the most heat. Then, add aromatics like onions and garlic to infuse the base. Follow with softer vegetables or grains that absorb flavors without overcooking. Finally, top with delicate herbs or fresh elements to preserve their brightness. Incorporating scenic views and charming local shops can transform your overall dining experience. Paying attention to ingredient order ensures each element contributes its best flavor, elevating your dish from home-cooked to restaurant-quality.
Ingredient Sequence Matters
The order in which you layer ingredients directly impacts how flavors develop and how evenly your dish cooks. Start with aromatics like onions, garlic, or carrots at the bottom to create a flavorful base. Then, add denser ingredients such as root vegetables or meats, which need longer cooking times. Lighter ingredients, like leafy greens or delicate herbs, should go on top to prevent overcooking. Proper layering ensures heat distributes evenly and prevents ingredients from competing for space or moisture. It also helps flavors meld naturally—spices and seasonings absorbed gradually. If you stack incorrectly, you risk uneven cooking or missing out on depth of flavor. Paying attention to ingredient layering can help you achieve a more balanced and flavorful meal. Additionally, understanding how tire pressure affects comfort and traction can be helpful when preparing for outdoor cooking sessions, especially if you plan to cook on uneven or gravel surfaces. Ensuring the right layering technique can make a significant difference in the final taste and texture of your dish. Properly tuning your vehicle, such as upgrading your Hyundai Santa Fe engine or suspension, can also improve your outdoor cooking adventures by ensuring your vehicle performs reliably over rough terrain.
Techniques for Achieving Even Cooking and Flavor Development

Achieving even cooking and rich flavor development in a Dutch oven requires attention to technique and temperature control. To do this effectively, start by preheating your oven gradually, avoiding sudden temperature changes that can cause uneven heat. Use a consistent heat source, like a well-regulated stove or oven, to maintain even temperature distribution. Stir ingredients regularly to prevent sticking and ensure all parts cook uniformly. Additionally, consider layering ingredients thoughtfully—denser items go on the bottom, lighter ones on top—to promote uniform cooking.
- Maintain a steady, moderate heat to prevent burning or undercooking
- Keep the lid on to trap moisture and flavor
- Use a thermometer to monitor internal temperatures
- Allow dishes to rest briefly before serving for flavor to fully develop
Tips for Managing Cooking Time and Temperature

Controlling cooking time and temperature in a Dutch oven is key to ensuring your dish turns out perfectly. Always start by preheating your oven or stovetop to the right temperature. Use a reliable thermometer to monitor heat levels, especially if you’re simmering or braising. Keep an eye on cooking times; overcooking can dry out ingredients, while undercooking leaves flavors underdeveloped. Adjust heat gradually—if it’s too high, reduce it to prevent burning or sticking. For delicate dishes, use lower, consistent heat and check periodically. Remember, residual heat continues cooking even after removing the Dutch oven from heat, so consider this when timing your meal. Proper heat management can also help in achieving ideal essential oil infusion and flavor absorption, enhancing your dish’s taste. Being mindful of temperature regulation in your cooking environment can help maintain consistent results. Developing an understanding of heat control techniques is essential for consistent culinary success. Additionally, understanding the effects of cooking time on ingredient texture and moisture levels can help refine your technique. With practice, managing heat and time becomes second nature, ensuring restaurant-quality results every time.
Creative Ways to Elevate Your One-Pot Meal Experience

Adding unexpected ingredients or flavor components can instantly elevate your one-pot meal from simple to extraordinary. Experiment with bold spices, fresh herbs, or a splash of acid like lemon juice or vinegar to brighten flavors. Incorporate unique textures by adding toasted nuts or crispy garnishes just before serving. You can also introduce international flair with ingredients like coconut milk, curry paste, or soy sauce to create depth. Consider finishing your dish with a drizzle of high-quality olive oil or infused oil for richness. For a visual boost, sprinkle colorful herbs or seeds on top. These small tweaks transform everyday ingredients into restaurant-quality dishes, making your one-pot meals more exciting and memorable. Creativity in flavor combinations keeps your cooking fresh and delightful. Layering techniques can also help build complex, satisfying flavors in your meals. Additionally, employing keto-friendly ingredients ensures that your enhancements align with your dietary goals without sacrificing flavor.
Frequently Asked Questions
Can I Use a Dutch Oven on an Induction Cooktop?
Yes, you can use a Dutch oven on an induction cooktop. Just verify your Dutch oven has a magnetic base, like cast iron or certain enameled varieties. Check if a magnet sticks to the bottom—that’s a good indicator it’ll work. Induction cooktops heat quickly and efficiently, so your Dutch oven will perform well. Just follow the manufacturer’s guidelines to prevent any damage and enjoy perfectly cooked meals.
How Do I Clean and Maintain My Dutch Oven?
To keep your Dutch oven in top shape, you should clean it after each use, dry it thoroughly, and occasionally season it with oil to prevent rust. You can scrub away food residues with a gentle brush or sponge, avoiding harsh soaps. Store it in a dry place, check for rust or damage regularly, and re-season as needed. This routine guarantees your Dutch oven remains non-stick, durable, and ready for your next delicious meal.
Are Enamel-Coated Dutch Ovens Safe for High-Heat Cooking?
Enamel-coated Dutch ovens are generally safe for high-heat cooking, but you should avoid exposing them to direct heat over 500°F to prevent damage. Always preheat gradually and use low to medium heat for best results. Avoid sudden temperature changes, like adding cold liquids to a hot pot, to prevent cracking. With proper care, your enamel-coated Dutch oven remains safe and durable for a variety of high-heat recipes.
What Are Common Mistakes to Avoid When Using a Dutch Oven?
Mistakes make meals miserable, so avoid common Dutch oven errors. Don’t forget to preheat your pot properly to prevent sticking. Avoid overcrowding, which hampers heat and hampers flavors. Be cautious with sudden temperature changes—don’t shock a hot Dutch oven with cold water. Also, neglecting to season or clean it thoroughly can cause sticking and rust. Master these mindful methods, and your Dutch oven dishes will deliver delightful, restaurant-quality results every time.
How Can I Adapt Recipes for Different Dutch Oven Sizes?
When adapting recipes for different Dutch oven sizes, you need to adjust the ingredients and cooking time accordingly. If your new size is larger, increase the ingredients proportionally, but be mindful of the liquid ratio to prevent overflows. For smaller sizes, reduce ingredients to avoid overcrowding. Keep an eye on cooking times, as larger pots may take a bit longer, and smaller ones might cook faster.
Conclusion
With your Dutch oven, you hold the key to transforming simple ingredients into a symphony of flavors. As you lift the lid, steam rises like a whisper of culinary magic, revealing a meal that’s rich, tender, and perfectly layered. Each stir and sear builds depth, turning everyday cooking into an artful experience. Embrace this secret, and watch your one-pot meals become warm, inviting masterpieces that taste as stunning as they look.