
To replace parts on your suction pool cleaner, start by inspecting for signs of wear like cracks, chips, or buildup on hoses, brushes, and seals. Turn off the device, disconnect it, and carefully remove damaged parts using the proper tools. Install new brushes, nozzles, and secure hoses tightly, then clean or replace the filter and skimmer basket. Checking your work and ensuring everything fits correctly helps maintain performance. Continuing with these steps will help you keep your cleaner running smoothly.
Key Takeaways
- Conduct a visual inspection to identify worn or damaged hoses, brushes, nozzles, and seals before replacement.
- Gather the correct tools and compatible replacement parts as specified in the owner’s manual.
- Carefully remove old components, clean the area, and handle with safety precautions.
- Install new parts ensuring proper alignment, secure fittings, and correct orientation for optimal performance.
- Regularly maintain and clean filters and check connections to prevent clogs and ensure efficient operation.
Identifying the Worn or Damaged Parts
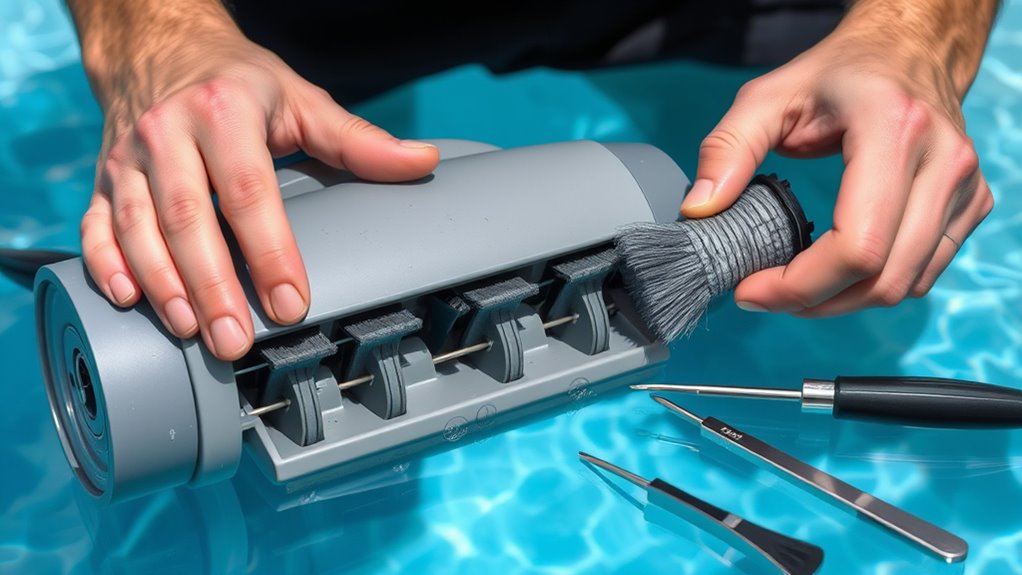
To effectively replace parts on your suction pool cleaner, you first need to identify which components are worn or damaged. Start with a thorough visual inspection of all parts, looking for signs of part wear such as cracks, chips, or corrosion. Check hoses, brushes, and the intake valve for any visible damage or buildup that could impair performance. Pay attention to the condition of the seals and gaskets—they should be intact and flexible. If a part appears cracked, brittle, or overly worn, it’s time to contemplate replacement. Recognizing these signs early helps prevent further damage and keeps your cleaner operating efficiently. Additionally, understanding how technological advancements impact maintenance practices can help you adopt more efficient troubleshooting methods. Regular visual inspections are key to spotting issues before they lead to more costly repairs or a complete breakdown. Incorporating proper maintenance routines can further extend the lifespan of your pool cleaner and improve its overall performance.
Gathering the Necessary Tools and Replacement Components

Before replacing any parts on your suction pool cleaner, gather all the tools and components you’ll need. This includes screwdrivers, replacement parts compatible with your model, and perhaps a wrench. Check your owner’s manual for specific items required. It’s also wise to review your maintenance schedule to ensure the cleaner is functioning properly and to identify any other potential issues. Keep in mind that proper pool chemistry supports cleaner performance, so ensure chemicals are balanced before proceeding. Having everything ready prevents delays and helps you work efficiently. Double-check that you have the right replacement components to avoid redoing the job. Being prepared saves time and ensures you can complete the maintenance smoothly, keeping your pool in top condition. Additionally, understanding the contrast ratio of your projector can help you optimize your home cinema setup for better image quality.
Ensuring your replacement components are compatible with your specific cleaner model can prevent compatibility issues during reassembly.
Removing the Old Parts Safely and Effectively
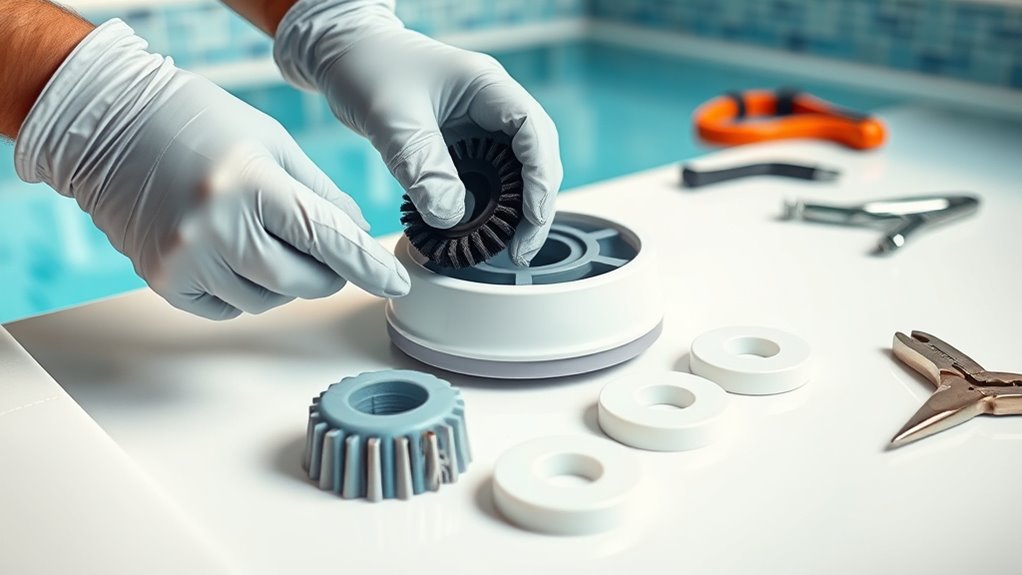
When removing old parts from your suction pool cleaner, make certain you do so carefully to avoid damaging any components. Start by turning off the cleaner and disconnecting it from the power source. Next, follow these steps:
- Inspect the parts for wear or damage, noting how they fit. regular inspections of equipment can help identify potential issues early and ensure optimal performance. Additionally, understanding proper maintenance techniques can extend the lifespan of your pool cleaner. Being aware of auras and energy fields emphasizes the importance of delicate handling and attention to detail during maintenance.
- Use appropriate tools to gently loosen and lift the parts, avoiding excessive force.
- Clean the surrounding area to prevent debris from interfering with the new parts and to maintain proper pool chemistry.
- Remember that proper maintenance and understanding of yoga practices and techniques can be beneficial in promoting overall equipment longevity and efficiency.
Always wear safety precautions like gloves and eye protection. Be mindful of sharp edges and delicate connections. Proper removal ensures the new parts fit correctly and helps maintain a safe, efficient cleaning process.
Installing New Brushes and Nozzles

Installing new brushes and nozzles is a straightforward process that guarantees your pool cleaner functions effectively. Proper brush maintenance ensures thorough cleaning, while nozzle calibration improves water flow and suction. Begin by removing the old parts carefully. Align the new brushes with their slots and press firmly until they click into place. Next, install the nozzles, ensuring they are correctly oriented for peak performance. Take a moment to check that everything is secure. Regularly inspecting and replacing these parts helps maintain efficient operation. Use the table below to understand key considerations:
| Task | Tip |
|---|---|
| Brush installation | Ensure brushes are aligned properly |
| Nozzle calibration | Confirm nozzles are oriented correctly |
| Brush maintenance | Clean brushes regularly |
| Nozzle replacement | Use compatible parts |
| Final check | Make sure all parts are secured |
Additionally, performing routine maintenance on your suction pool cleaner can extend its lifespan and improve cleaning efficiency.
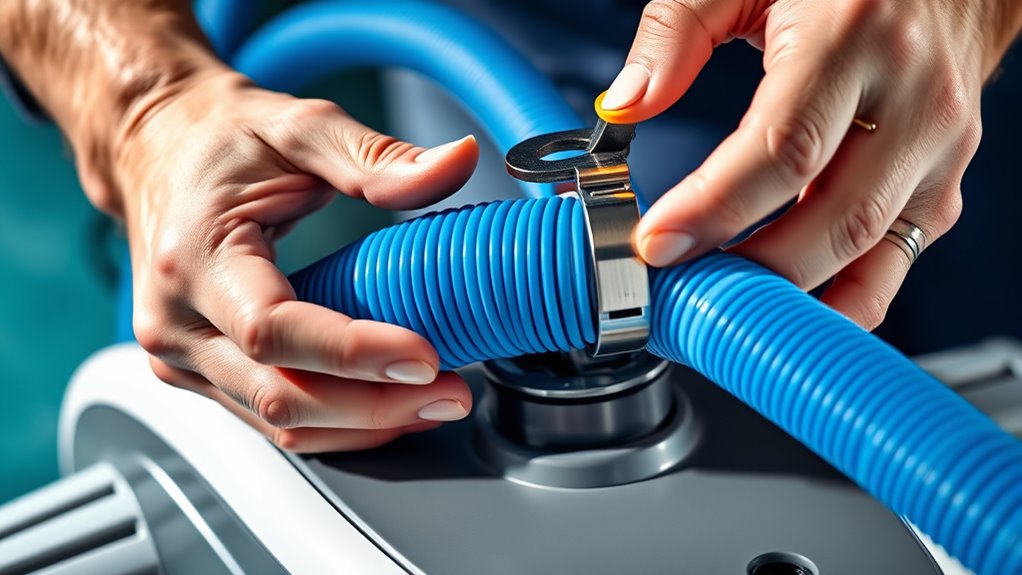
Replacing and Securing the Hoses
Start by inspecting your hose connections to make certain they’re tight and free of leaks. Next, secure the hoses properly to prevent any disconnections during cleaning. Taking these steps helps keep your pool cleaner running smoothly. Additionally, using colorful presentation in your pool cleaning setup can make the process more engaging and visually appealing.
Inspect Hose Connections
To make certain your suction pool cleaner operates effectively, it’s crucial to regularly inspect the hose connections. Start by checking the connection fittings for any signs of wear, cracks, or leaks. Next, examine the hose material itself for flexibility, cracks, or bulges that could impair suction. Finally, ensure all fittings are tightly secured and properly aligned to prevent air leaks. When inspecting, look closely at the connection fittings to confirm they haven’t loosened or become damaged. The hose material should be free of cracks or brittleness, indicating it’s still in good condition. Properly secured and intact connections help maintain optimal suction power and prevent debris from escaping. Regular inspections keep your cleaner working efficiently and extend its lifespan. Additionally, paying attention to environmental considerations can help prevent damage caused by exposure to outdoor elements. Being aware of potential wear and tear signs can further ensure your equipment remains in top condition. Incorporating routine maintenance practices such as cleaning and replacing worn parts can also enhance the longevity and performance of your suction pool cleaner. Monitoring connection integrity can help identify issues early before they impact cleaning performance.
Secure Hose Properly
Ensuring your hoses are properly secured is key to maintaining effective suction and preventing leaks. Start by checking that hose fittings are tightly connected and free of cracks or damage. Use hose clamps to firmly secure the hoses to the fittings, ensuring they don’t slip or detach during operation. When attaching hoses, double-check the connections and tighten hose clamps as needed, but avoid overtightening, which can damage the fittings. Properly secured hoses help maintain consistent suction power and prevent water leaks that could impair cleaning performance. Regularly inspect the clamps and fittings for wear or looseness, especially after cleaning or moving the pool cleaner. Additionally, understanding how hydrocolloid technology in pimple patches works can be helpful for effective blemish treatment. Routine maintenance and proper securing of hoses extend the lifespan of your pool cleaner and ensure optimal operation. Performing periodic checks on your hose connections can further prevent potential issues and ensure smooth operation over time. Paying attention to hose material quality can also improve connection stability and durability.
Cleaning and Replacing the Filter and Skimmer Basket
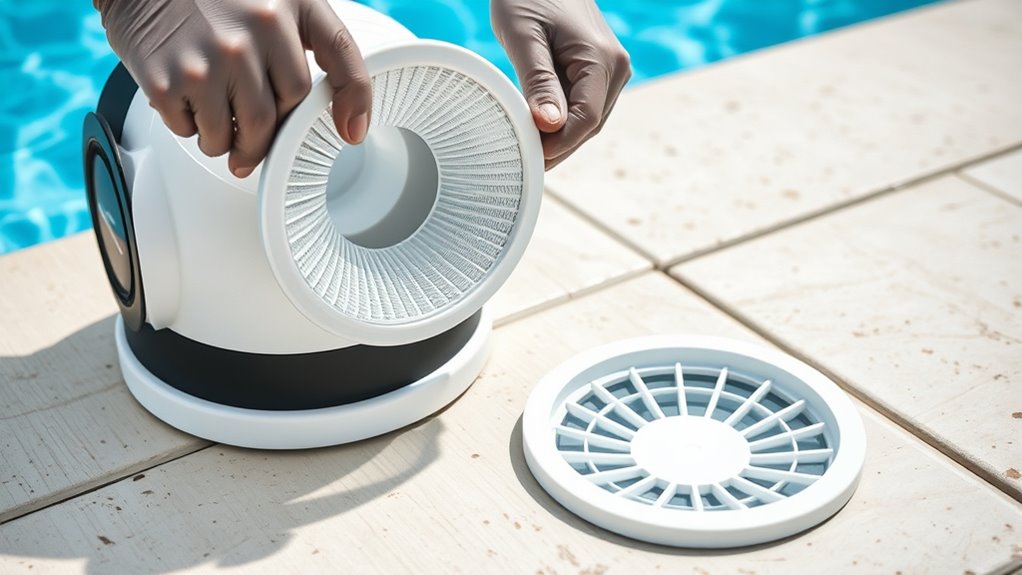
Regularly cleaning and replacing the filter and skimmer basket keeps your suction pool cleaner working efficiently. To do this, start with filter maintenance by removing the filter cartridge or screen and rinsing it thoroughly with water to remove debris. This process helps maintain optimal water flow and prevents clogs that can hinder your pool cleaner’s performance. Additionally, ensuring the proper functioning of the filtration system is vital for overall pool health and efficiency. Regularly inspecting filter components can help identify potential issues early and prevent costly repairs. Keeping automated systems in good condition also contributes to consistent operation. Next, focus on skimmer basket cleaning:
- Turn off the pump and lift the skimmer lid.
- Remove the basket and clear out leaves, dirt, and debris.
- Rinse the basket before reinserting it securely.
Perform these steps weekly or more often if your pool sees heavy use. Regular upkeep prevents clogs, improves water flow, and ensures your cleaner operates at peak performance. Keeping the filter and skimmer basket clean is a simple, effective way to prolong your pool cleaner’s lifespan. Additionally, inspecting the pool filtration system regularly can help identify potential issues early and maintain optimal operation. Proper maintenance of these components supports efficient water circulation and overall pool health.
Testing the Cleaner to Ensure Proper Functionality

After cleaning the filter and skimmer basket, it’s important to test your pool cleaner to confirm it’s working correctly. Turn on the cleaner and observe how it moves across the pool water. Check if the suction power is strong enough to pick up debris efficiently. If it moves sluggishly or leaves debris behind, inspect the hose and inlet for blockages or leaks that could reduce suction. Ensure the cleaner glides smoothly without hesitation. You might notice reduced performance if parts aren’t fitting properly or if the new parts aren’t installed correctly. Adjust the hose length or reposition the cleaner if necessary. Testing it thoroughly helps you confirm that the replacement parts are functioning properly and that your pool cleaner is ready to keep your pool spotless. Additionally, proper maintenance and correct installation can prevent issues related to ineffective purification, ensuring optimal performance of your cleaner.
Frequently Asked Questions
How Often Should I Replace Parts on My Suction Pool Cleaner?
You should follow a regular replacement schedule to keep your suction pool cleaner working efficiently. Typically, check parts like brushes, hoses, and seals every 2-3 months, and replace them as needed. For maintenance tips, inspect for wear and tear often, clean filters regularly, and replace worn parts promptly to prevent damage. Staying proactive ensures your cleaner runs smoothly and extends its lifespan.
Can I Use Generic Parts or Should I Stick to Original Manufacturer Replacements?
You might wonder if you can use generic parts or should stick to manufacturer replacements. While generic parts can be cheaper, they often don’t fit or work as well, risking damage or reduced performance. Manufacturer replacements are designed specifically for your cleaner, ensuring proper fit and function. To keep your pool cleaner running smoothly, it’s best to use original parts, though some high-quality generic options can work if verified for compatibility.
Are There Specific Safety Precautions for Handling Internal Components?
When handling internal components, you need to prioritize electrical safety and proper component handling. Always disconnect the cleaner from power before working on it, and wear insulated gloves if necessary. Be cautious of sharp edges and delicate parts to avoid damage or injury. Follow the manufacturer’s instructions carefully, and work in a dry, well-lit area. These precautions help prevent accidents and guarantee safe, effective maintenance of your suction pool cleaner.
What Signs Indicate My Pool Cleaner Needs Urgent Part Replacement?
Your pool cleaner whispers warnings when it’s struggling to do its job. If you notice decreased suction, strange noises, or incomplete cleaning, it’s time to act. Changes in pool chemistry can affect performance, so keep an eye on water balance. Also, if your cleaning schedule isn’t producing the same results, it might signal a part needs replacing. Address these signs promptly to keep your pool sparkling and efficient.
How Do I Troubleshoot if the Cleaner Still Doesn’t Operate Properly After Replacement?
If your pool cleaner still doesn’t work after replacing parts, start troubleshooting by checking for common issues. Verify the hose connections are secure and the skimmer or suction port isn’t clogged. Make certain the cleaner’s wheels or brushes move freely, and the filter isn’t blocked. Troubleshooting tips like these help identify if the problem lies elsewhere, so you can fix it quickly and get your cleaner back to peak performance.
Conclusion
Think of your suction pool cleaner as a well-tuned orchestra; each part plays a crucial role in harmony. By replacing worn or damaged components, you’re restoring its symphony of clean water and sparkling surfaces. With a little effort and attention, you keep your pool’s performance smooth and reliable. Remember, maintaining your cleaner is like tending a garden—regular care ensures a vibrant, trouble-free swim season ahead. Keep it maintained, and enjoy crystal-clear waters all season long.